

どうもハルです。
今回は、Apple DeveloperでIdentifiers登録してプロファイルを作成する方法を紹介します。
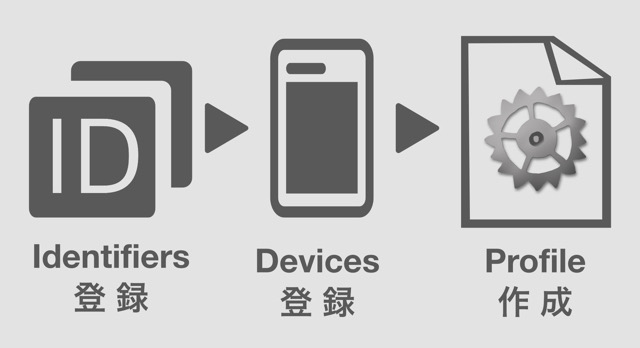
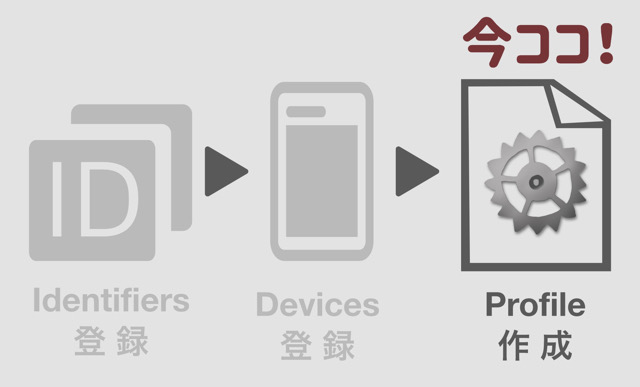
ステッカー作成に必要な情報を、Apple Developerに登録、Xcodeで必要なプロファイルを作成、macにダウンロードします。
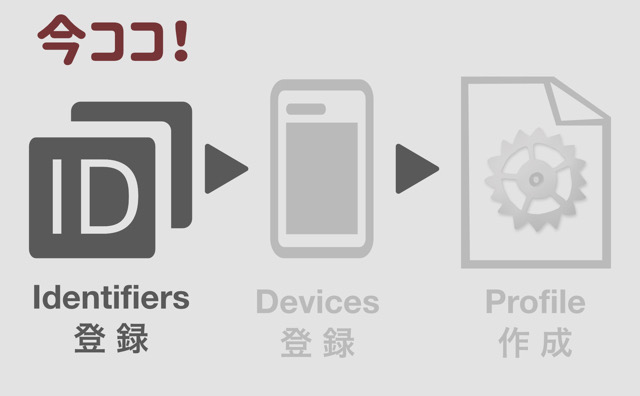
・identifiersの登録
・Devicesの登録(2回目以降やらない)
・Profileの作成
Apple DeveloperでIdentifiers登録してプロファイルを作成

Apple DeveloperでIdentifiersの登録をして、プロファイル(Profile)を作成します。▲
プロファイルは、Xcodeでステッカーを作成して、最後アップロードする時に、ステッカーデータと一緒に添付します。
プロファイルの中には、ステッカーを識別するための情報(Identifier)を登録します。
初心者にとってはやや難しいので、画像を使って解説していきます。
Identifiersの登録【毎回必要】
Identifierは、本体用とステッカーパック用の登録をします。
まず、Apple DeveloperのIdentifiersを開く
本体用のIdentifiersを登録する
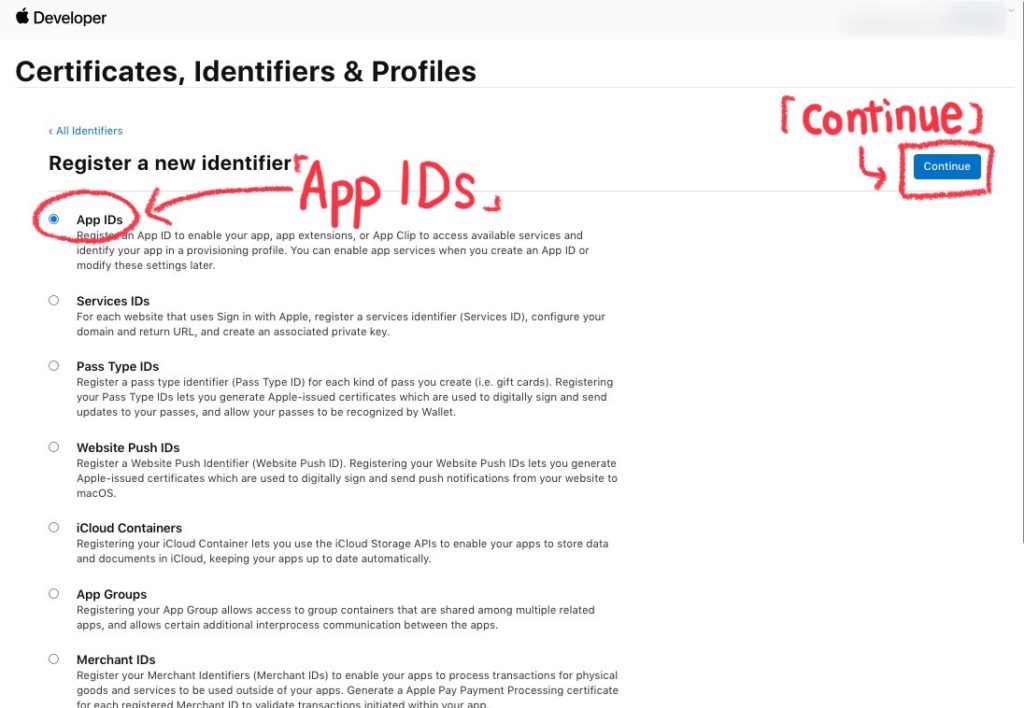
①[ + ]ボタンをクリック 。▼

②「App IDs」 を選んで [Continue]。▼
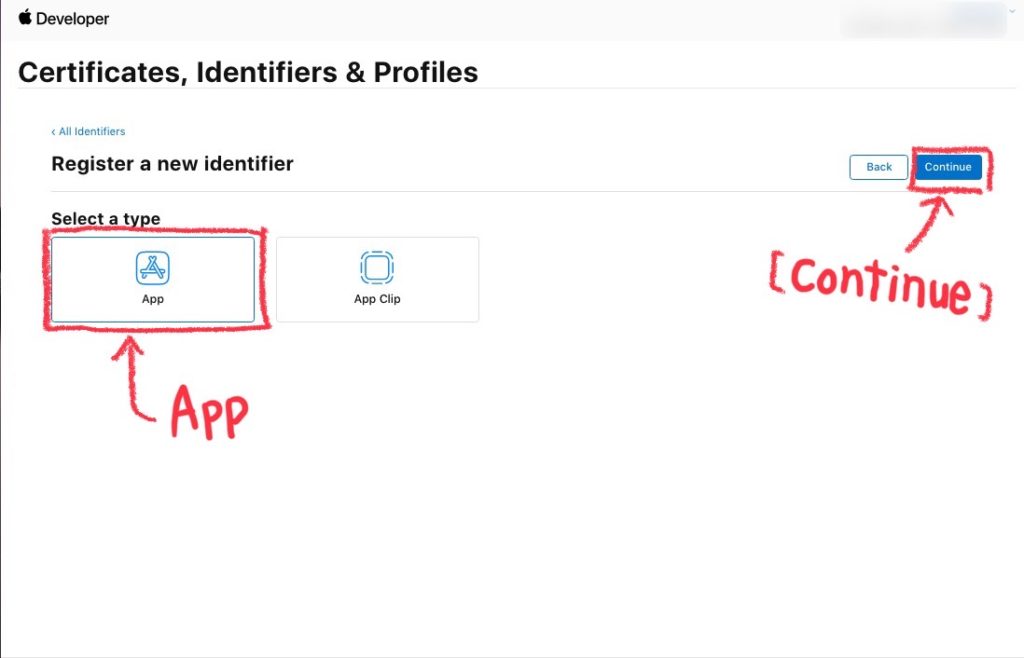
③[App]を選んで[Continue]。▼
DescriptionとBundle IDを入力していくよ。
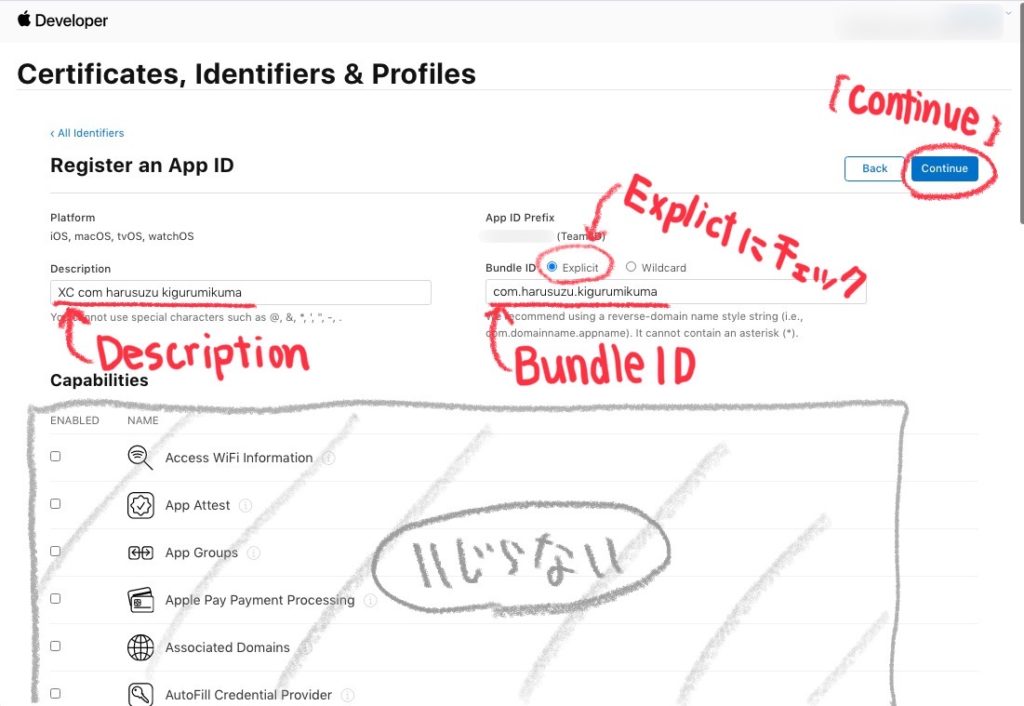
④DescriptionとBundle IDを入力
あらかじめ「プロダクト名」と「組織名」を考えておきます。
プロダクト名 : kigurumikuma
組織名 : harusuzu
「着ぐるみクマ(kigurumikuma)」というステッカーを作成する予定です。▼

Identifierは、ドメインを逆にしたような形式になります。
Description(説明)は、XCを先頭に付け ” “(空白)で区切って入力。
Bundle IDは、XCを付けず ” . “(ドット)で区切って入力。
・Description:XC aa bb cc
・Bundle ID:aa.bb.cc
“aa”部分にcom (jp netとかでもOK)、”bb”部分に組織名、”cc”部分に:プロダクト名を入力するとこのようになります。↓
com/組織名/プロダクト名
入力例
Description:XC com harusuzu kigurumikuma
Bundle ID:com.harusuzu.kigurumikuma
Capabilitiesはいじらない、Explicitにチェックを入れ、入力できたら[Continue]。▼
⑤内容を確認して、[Register]で登録。▼

⑥本体用のIdentifierrsが登録できました。▼

次に、ステッカーパック用のIdentifiersを登録するよ。
ステッカーパック用のIdentifiersを登録する
①~⑥の要領で、ステッカーパック用のIdentifiersを登録。
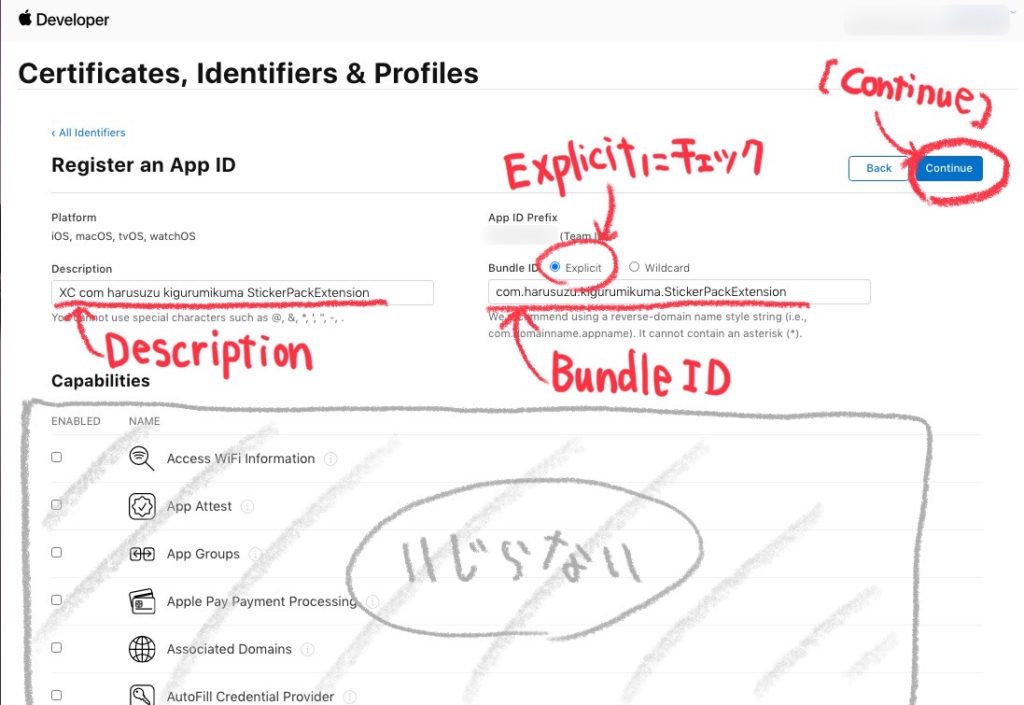
DescriptionとBundle IDのところだけ、入力が変わります。
ステッカーパック用は最後に「StickerPackExtension」という文字列を必ず入力します。
Description:XC aa bb cc StickerPackExtension
Bundle ID:aa.bb.cc.StickerPackExtension
入力すると、このようになります。↓
com/組織名/プロダクト名/StickerPackExtension
入力例
Description:XC com harusuzu kigurumikuma StickerPackExtension
Bundle ID:com.harusuzu.kigurumikuma.StickerPackExtension
Capabilitiesはいじらない、Explicitにチェックを入れ、入力できたら[Continue]。▼
入力したら[Register] で登録。
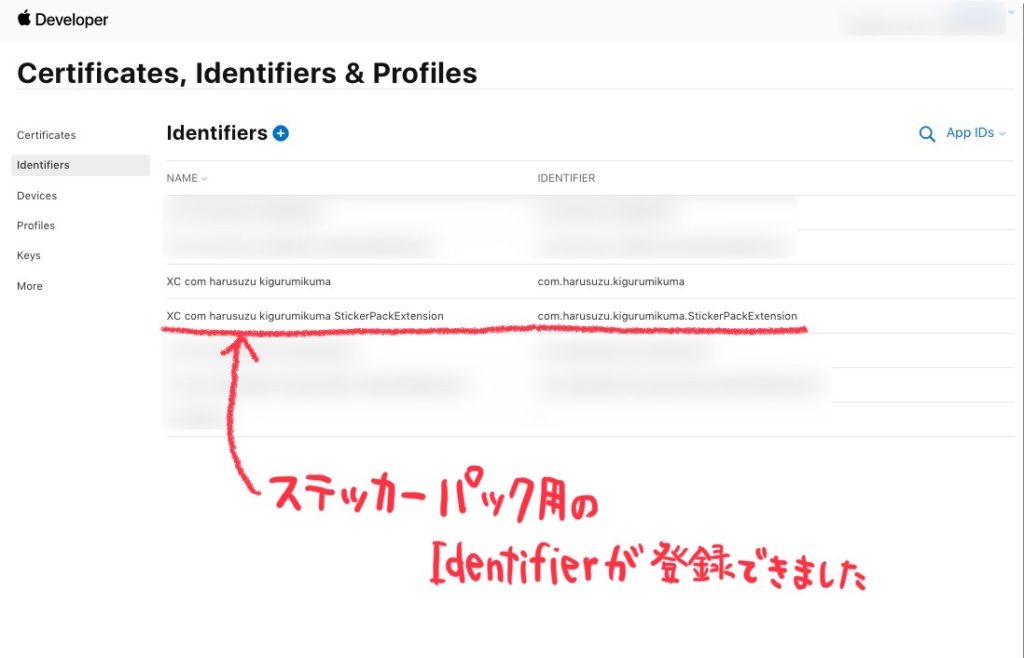
これで「本体用」と「ステッカーパック用」2つのIdentifiersが登録できましした。▼
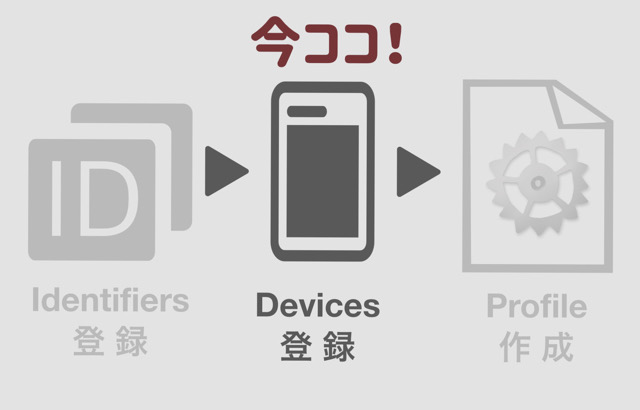
Devices(デバイス)の登録【2回目以降必要なし】
Apple Developerに手持ちのデバイスを登録しておくことで、Xcodeで作成したアプリをデバイス本体にインストールしてテストすることができます。
まずは、手持ちのデバイスの「UDID(識別子)」を確認するよ。
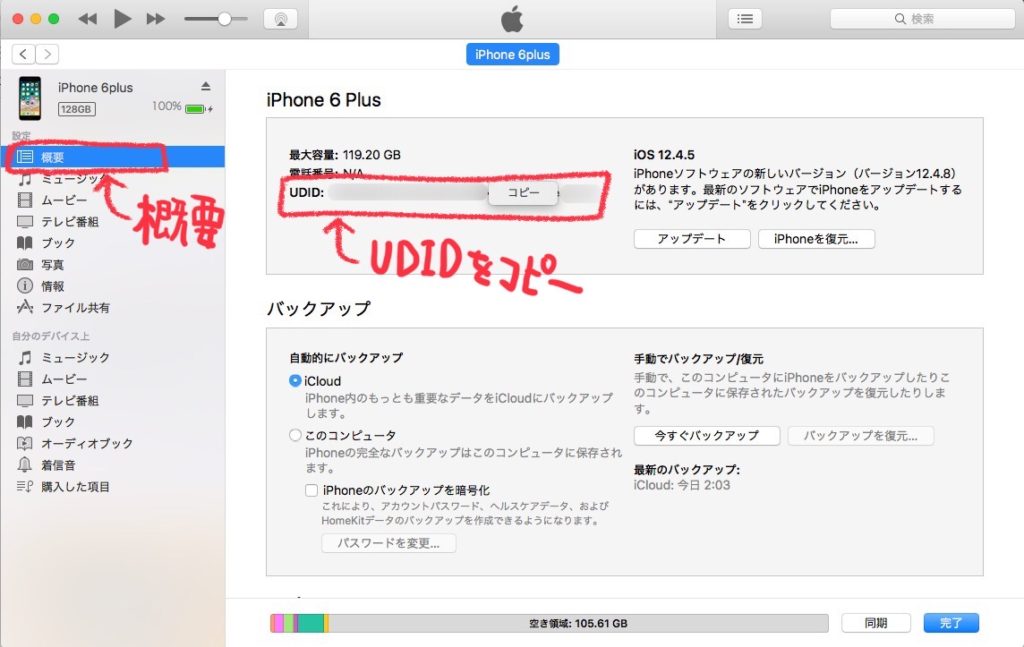
①iPhoneをmacに接続
②iTunesを起動
③[概要]>[シリアル番号]の文字をクリック
④[UDID(識別子)]が表示される
UDIDを、[Control+クリック(または右クリック)]でクリップボードにコピー。▼
次にApple Developerで、デバイスのUDIDの登録するよ。
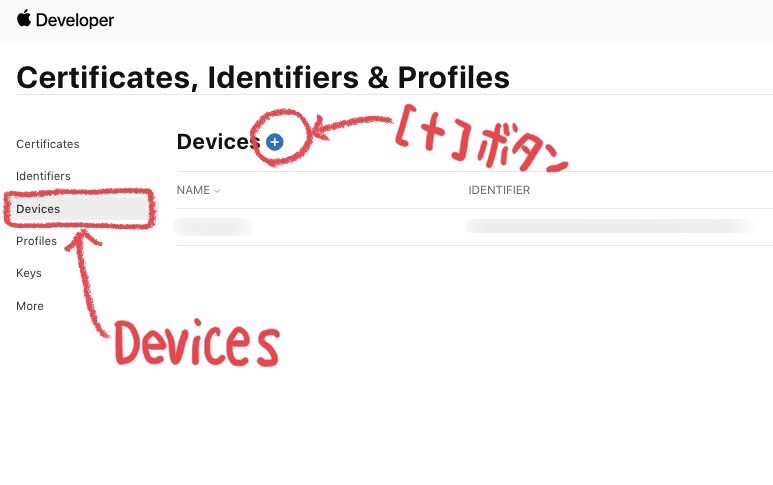
Apple DeveloperのDevices を開く。
[Device]>[ + ]ボタンをクリック。▼
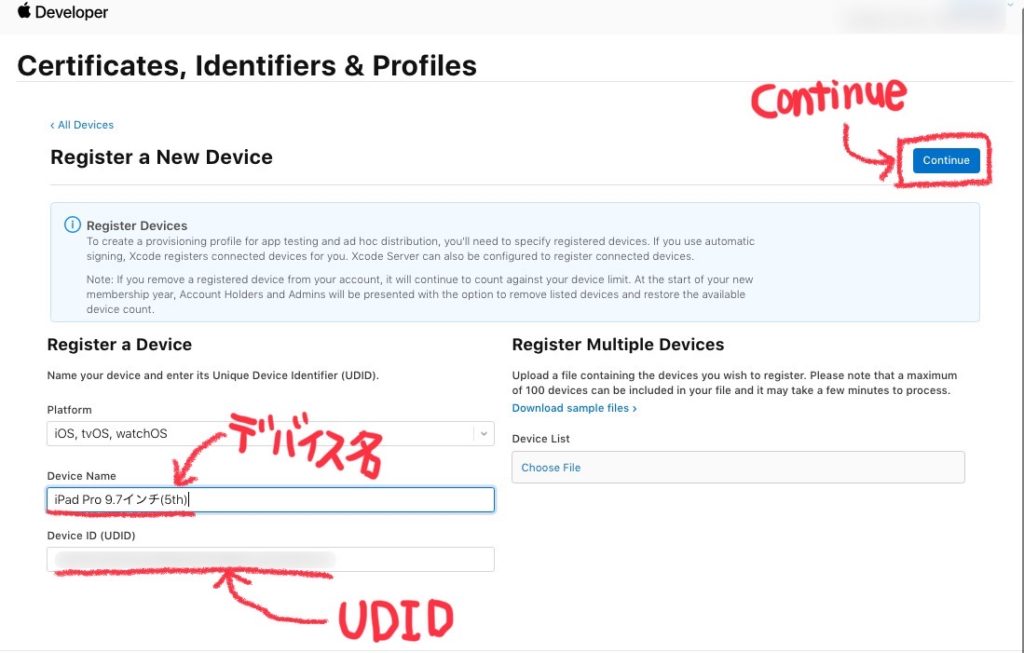
Device Nameにデバイス名、Device ID欄にUDIDを入力
[Continue]をクリック。▼
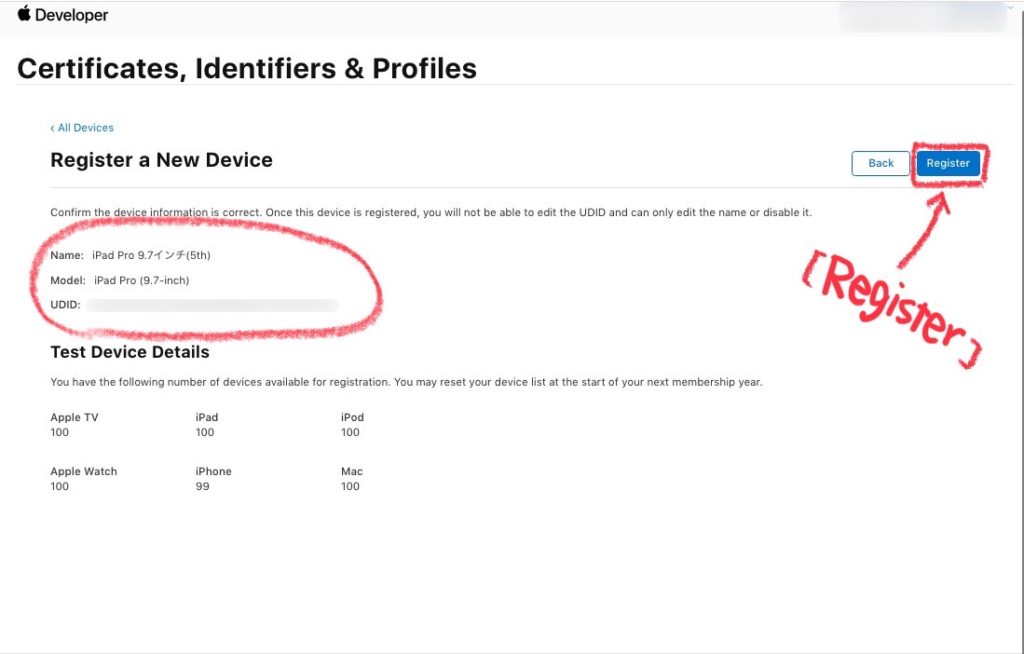
内容を確認して[Register]をクリック。▼
登録完了、[Done]で閉じる。▼
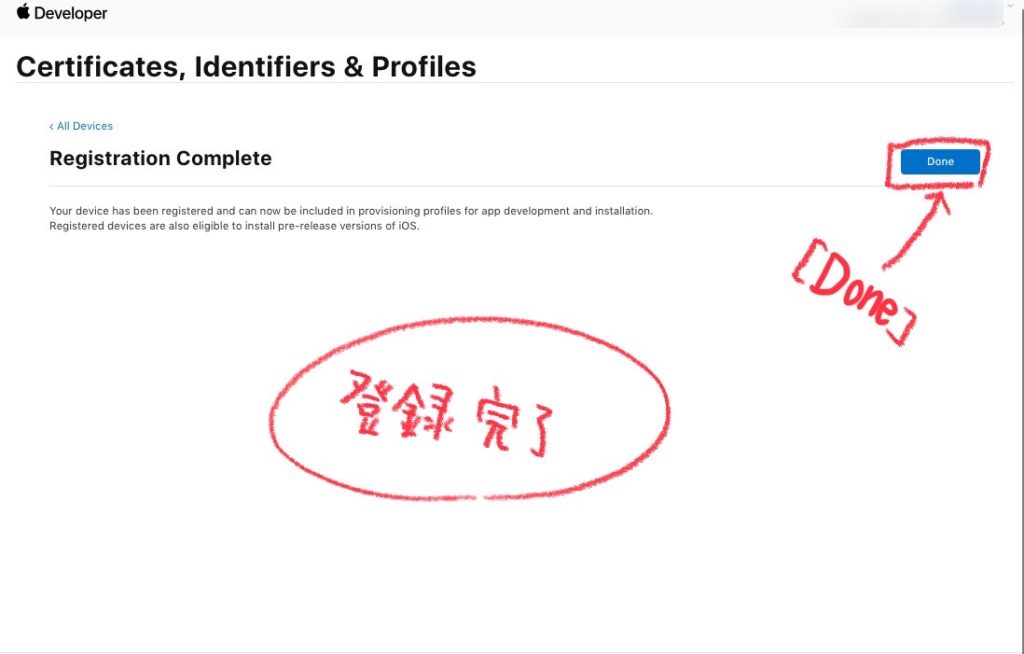
最大100台のデバイスを登録できるよ。
Profile(プロファイル)の作成【毎回必要】
プロファイルを作成して、macに保存。
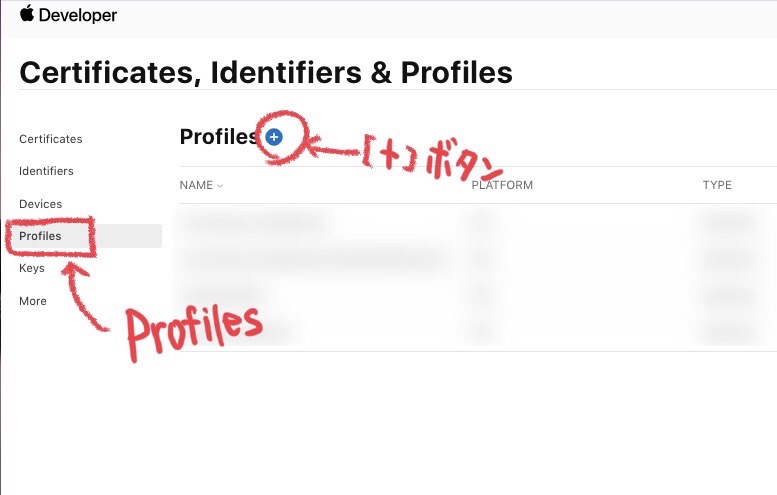
Apple DeveloperのProfiles で、プロファイルを作成する。(毎回必要)
「ステッカー用」と「ステッカーパック用」2つのプロファイル作成するよ。
①[Profiles]>[ + ]をクリック。▼
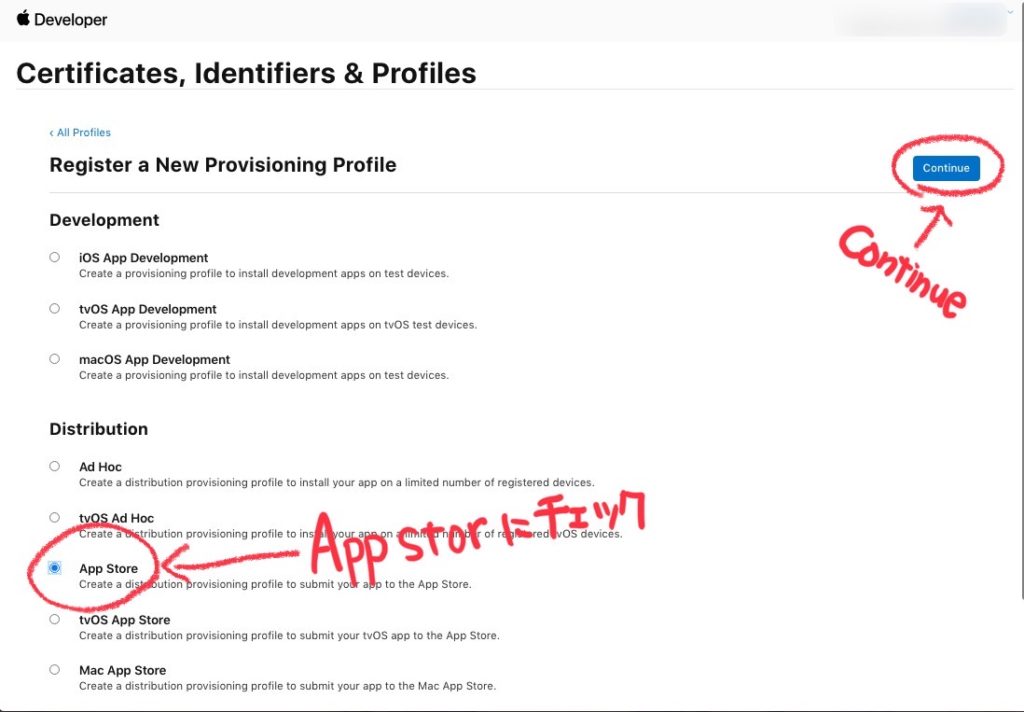
②Distributionの「App Store」にチェックを入れて [Continue]。▼
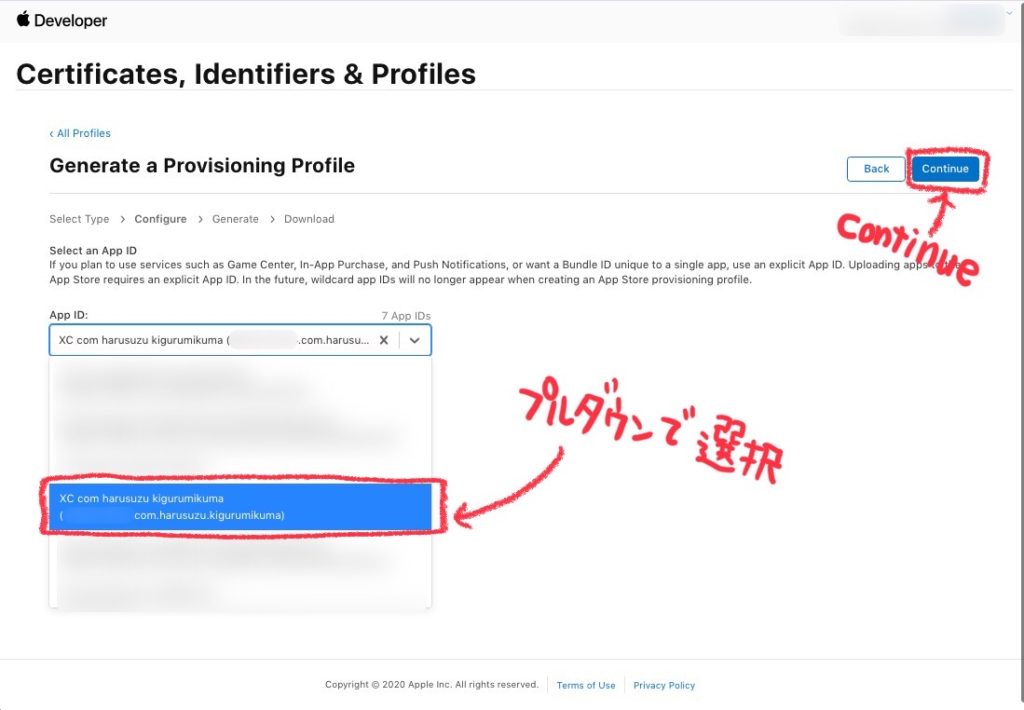
③先ほど作った Identifiers を、App IDのプルダウンで選択して [Continue]。▼
④Certificate(証明書)の名前にチェックをして [Continue]。▼

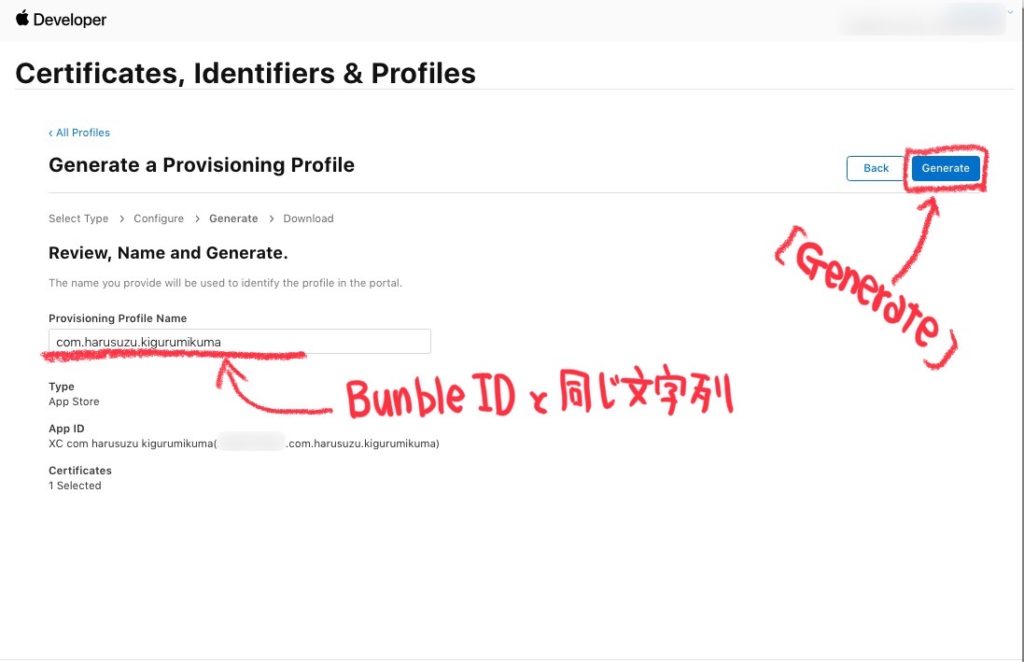
⑤「Provisioning Profile Name」にBundle IDと同じ文字列を入力。
入力例
com.harusuzu.kigurumikuma(本体用)
com.harusuzu.kigurumikuma.StickerPackExtension(ステッカーパック用)
を入力して [Generate]。▼
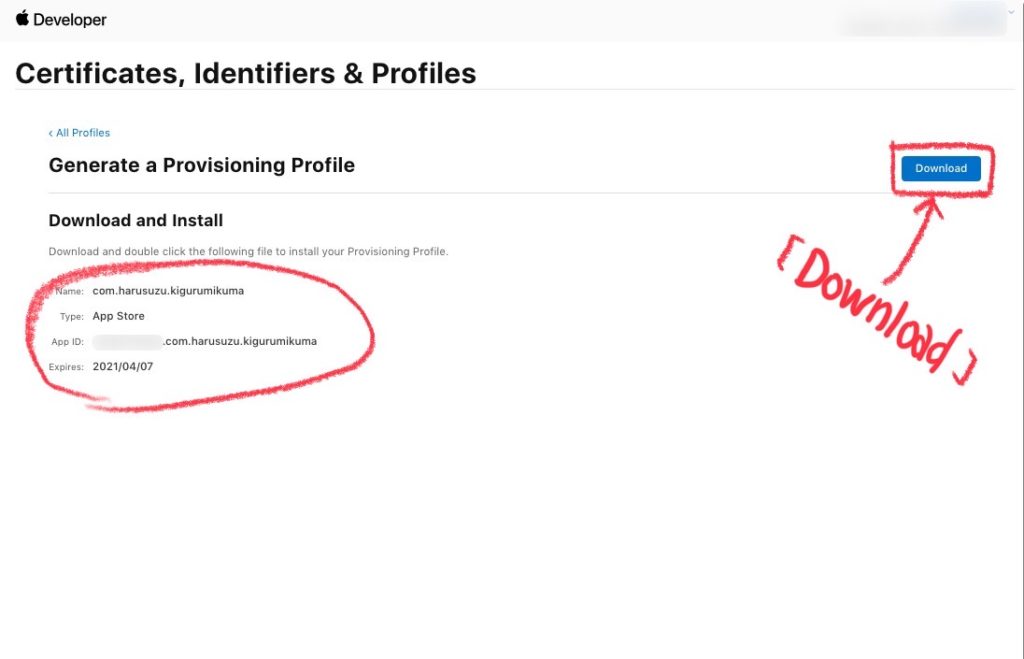
内容を確認して[Download]。▼
本体用を作成したら[All Profile]で最初に戻って、同じ手順でステッカー用のプロファイルをダウンロードします。
ダウンロードしたプロファイルは、ステッカー作成時(最後にXcodeでアーカイブをアップロードする時)に使います。
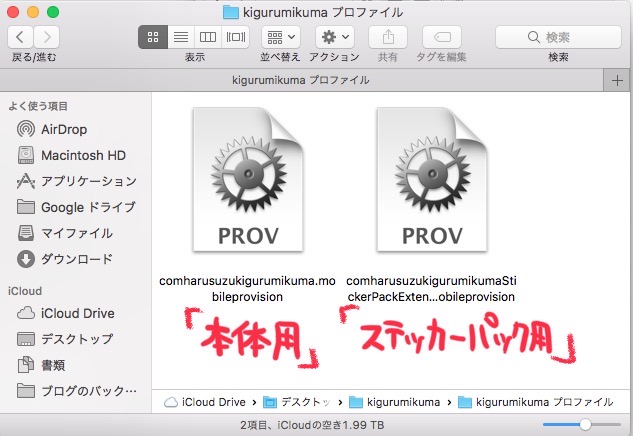
・「本体用」
・「ステッカーパック用」
2つのプロファイルを、macに保存しておく。▼
以上、Apple DeveloperでIdentifiersの登録をしてプロファイルを作成する方法の紹介でした。
最後まで読んでいただき、ありがとうございます。
iMessageステッカー自作方法は、こちらを参考にしてください。▼


コメント
[…] 詳しい方法はこちら→【Apple Developer】Identifiers登録してプロファイルを作成 […]